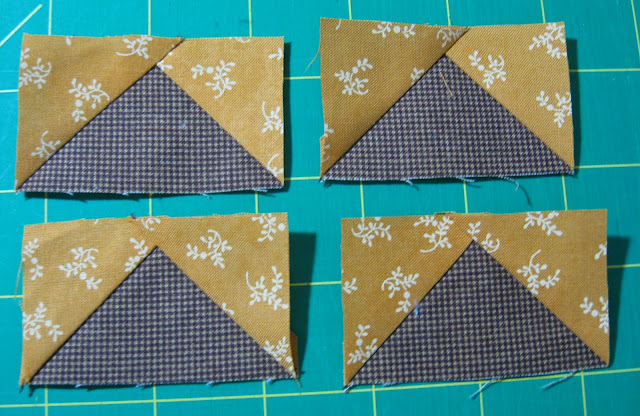
This method is used in my Farmer's Wife Quilt Revival pattern classes. The 'No Waste' Flying Geese method is a great technique, making ease out of many Farmer's Wife Sampler quilt blocks. To learn more about my pattern classes for the Farmer's Wife Sampler Quilt, (using very few templates!) click HERE for more information
To make 'No Waste' Flying Geese:
Cut a square the finished length measurement of the desired flying geese unit
and add to this, 1-1/4" (1.25)
Cut 4 squares the finished height measurement
of desired flying geese and add 7/8" (.875)
Example:
To make 1-1/2" x 3" finished flying geese units, cut 1 square
4-1/4".
Next cut (4) 2-3/8" squares
Stitch them together as shown below
Mark a diagonal line corner to corner on the smaller squares and place right sides together with the bigger square, like this:
Stitch a 1/4" on either side of the drawn line
Cut apart on the drawn line.
creating 2 of these units
press seams towards small triangles
place a small square right sides together with both units from above like this:
stitch 1/4" on either side of the drawn line
cut apart on the drawn line
Yields 4 Flying Geese units


Now that is so neat....never saw it done that way...thank you.....
ReplyDeleteGreat Tutorial! Thanks! I love Mary Ellen's...love it!
ReplyDeleteGreat!!! I love the Flying Geese quilts and want one for my bed, this will make it so much easier to do, thank you x
ReplyDeleteGreat tutorial ... I've linked to it in one of my blog post on a quilt with flying geese. Your work is just beautiful, you've mastered your craft! http://busybeeno16.blogspot.com/2013/07/a-short-tale-of-two-quilts.html
ReplyDeletei remember my flying geese i am wanting to do another because i came across your blog!
ReplyDeleteGracias... muy interesante el tutorial, muy bonito todo lo que haces. Besos
ReplyDeleteTe escribiría en Inglés pero no lo domino mucho.
Thank you so much . Your tutorial is a best.
ReplyDeleteGreat tutorial!
ReplyDeleteLove your landscape pic! Those Lucy episodes are still hilarious!
Thank you!!! You have the sizes I need, hugs xoxoxoxo
ReplyDeleteloved this tutorial, I will test the morning , thank you .... hugs Brazil
ReplyDelete(sorry my english , it's bad I know)
Mine turned out 1/2" too big. But I love the process and will try again!
ReplyDelete